Showing posts with label seasonal. Show all posts

Tuesday, March 29, 2016

Tulips on a Tuesday

I convinced my family to drive up to the Skagit Valley Tulip Festival today. Actually, the official festival hasn't started yet. It is supposed to be in April but the flowers had other ideas! The majority of the tulips are in bloom, as you can see above.

I was very thankful to have beaten the crowds. Tuesday morning is a great time to visit! My boys are on Spring Break but I don't think many other schools are off right now. C wasn't thrilled about going to see flowers but he enjoyed the mud.
I was able to get C to pose for a photo. His brother is away on a school trip.
In the photo above you can see that some tulips haven't bloomed yet. We got a (partial) family photo taken. We had lunch at the Calico Cupboard in La Conner.

More tulip photos. Remember to click on them to enlarge.


Pin It

Saturday, January 09, 2016

New Year shelf

I have a little shelf by the front door that I like to decorate for the seasons or holidays. This one is self-explanatory. The numbers are paper mache from Hobby Lobby. I spray painted them gold then glued the patterned paper on them.

The  New Year printable (in the black frame) is from eighteen25 blog.

The "do dad" is a Christmas ornament that was originally purple. I found it on after Christmas clearance at Michael's for 80 cents. I sprayed it gold.

Happy New Year!!Pin It

Thursday, December 17, 2015

Some Christmas crafting

I enjoy making Christmas-themed crafts. I usually make something new every year. This year I made a shadow box nativity and a bunch of pom pom trees. I have some other crafts that are not completed, but that's OK. :) Crafting is a great activity to keep my sanity while the 3rd football game of the day is on TV.
In the background is my new accent chair. It matches my robins egg blue wall really well!
The pom pom trees was an idea I found in Creatively Christmas - a book I checked out from my library.

These trees are very easy to make.
Directions:
- paint the paper mache trees white with acrylic paint. The trees came from Hobby Lobby.
- glue the pom poms on. I used white Tacky Glue. Leave some spaces for the jingle bells. You will need approx. 150 pom poms no matter what size you use.
- glue on the jingle bells. You will need approx. 40.


The shadow box nativity was an idea that I found at Ben Franklin craft store in Monroe.

The figures are all buttons. They are made by Dress it Up. I found some of the buttons at Hobby Lobby and some at Ben Franklin. The shadow box came from Ben Franklin. The background is starry night scrapbook paper. If you make this, be sure to cut the shanks off the backs of the buttons. I used E6000 glue for this project and spanish moss for the "hay." My hubby wants me to add LED lights to this.

This paper wreath hangs in my kitchen.
I made it last year using a kit from Paper Source - a store in Bellevue and University Village.


Pin It

Saturday, October 24, 2015

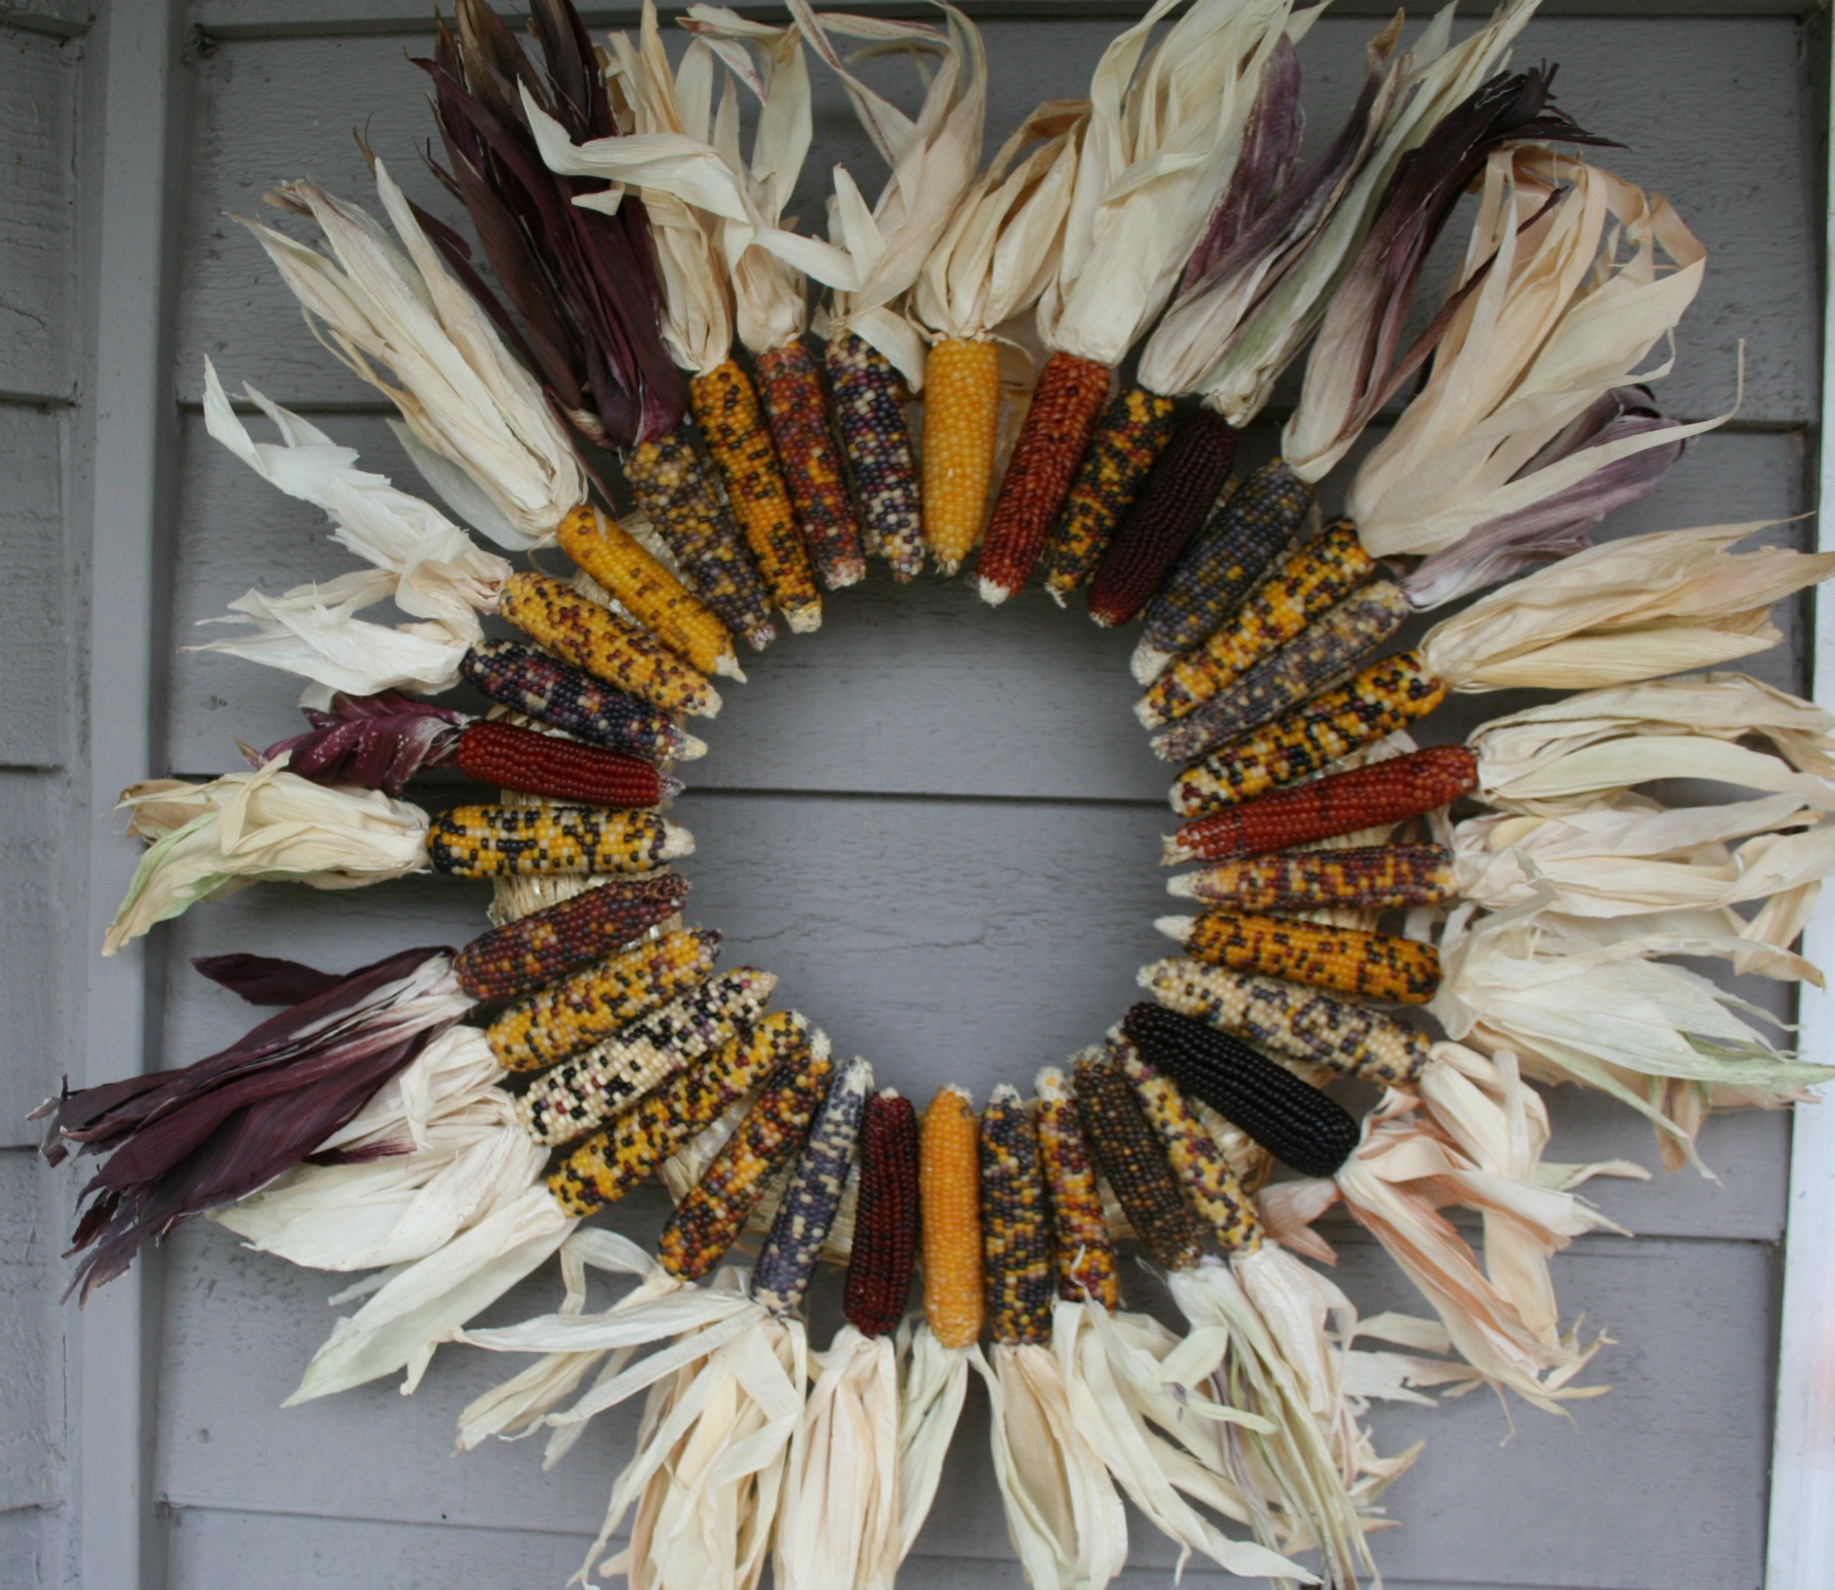
Indian Corn Wreath

I haven't made a wreath in a while. When I was changing my decor for fall, I realized that I needed a fall wreath for outside. I decided to make an Indian corn wreath.

Supplies needed:
- straw wreath form
- Indian corn (real, not faux) - these come in various sizes. I picked the medium ones. Fred Meyer had a large quantity, which I needed. I used 34.
- glue gun with lots of glue sticks.

I'm pretty happy with the outcome. Even my 12 year old said it was cool, which is high praise. :)


Pin It

Friday, October 10, 2014

Fun in the Sun at Bob's Corn


This past Sunday afternoon was beautiful and there wasn't a Seahawks game scheduled, so I said, let's go to a farm! I chose Bob's Corn because we have never been to it before. I expected a MUCH smaller place so I was pleasantly surprised at all the facilities. Corn maze, hay rides, playground, pumpkin patch, a red barn, lots of food choices, farm animals, and an apple cannon. More about that later. They also had their own apples and corn for sale. My favourite feature was the apple cinnamon donuts. Yum!

We had hoped to go in the corn maze but the price  is 8 dollars a person. Wow! That would be pretty pricey for a family of four! We chose the much more affordable and wild apple cannon. You get 10 apples (ammunition) for 10 dollars. We all took a turn and we quite successful in hitting the targets.


 We let the boys use my camera to take our photo. They did a great job!

One fun fact. The employees' name tags all had something (underneath their name) to indicate how they were related to Bob, such as "Bob's Friend's Son." The boys had fun making up relationships to Bob on the way home. Another fun memory is stopping on the road for a sign that said "Little Girl's Pumpkin Patch." A young girl was selling pumpkins and gourds she had grown herself. She had some amazing pumpkins. Sadly, we had spent all our cash so we could only buy a dried corn stalk from her.
Pin It

Thursday, September 11, 2014

Back to School Mantle

I've wanted to do a "back to school" mantle for a year or so. I find it hard to go straight from my beach themed mantle to a fall one. Hence, a back to school one.
The periodic table poster is wrapping paper made by Cavallini which I bought at Paper Source.
The school house is vintage Fisher Price.
I found the globe at Ross.
I made the banner with flash cards from the dollar section at Target. I simply punched holes at the top of each card and strung it on some brown cord I already had around the house.
I spelled out Back to School with Scrabble letters.

My boys weren't happy when I was creating this mantle. This was before school had started and they weren't too anxious to get back to school!


Pin It

Tuesday, April 08, 2014

Pink and Green Fabric Garland for Spring

This was NOT one of those quick and easy projects. Far from it! I actually started making this garland a year ago. I did stop for a long time, though. :)

I found the inspiration at Two Shades of Pink - flowers and leaf vine garland.

I made the flowers according to her directions (a year ago!), however, I found them too floppy. I decided to use Heat n Bond to make the fabric two layered and then cut out the petals. This made much sturdier flowers. I also made way more green leaves than in the original.  I don't like to see bare string/ribbon/jute in a banner. I love the fullness of this garland.

Close up view:

Materials needed - if you are crazy enough to make one of these!

  • pink fabric - maybe a yard?
  • green fabric - two different patterns
  • jute 
  • Heat n Bond 
  • felt for the backs of the flowers
  • floral wire
  • buttons 
  • glue gun.

Here is a view of the entire banner. Click to enlarge.
I think this project may have pushed me over the edge to getting a Silhouette die-cutting machine.
I spent WAY too much time tracing and cutting out fabric!Pin It

Thursday, February 13, 2014

Valentine's Day Mantle

I'm excited to show off my Valentine's Day Mantle. It was actually one of the cheapest mantles I've done. I bought a new apothecary jar (50% off at Michael's) and I had to buy some candy but other than that, it was next to free. I shopped my house, crafted, and found a free printable. I love how the red items really pop in front of my blue wall.

Here is a close up of the love printable I found online.
It is 1 Corinthians 13. I found the red, pink, and white candies in the bulk section at Winco. The frame is from my stash of thrift store finds. I painted it white.

For the big X and O, I got the paper mache letters at JoAnns. I put mod podge on them and dumped a LOT of red glitter on them. This isn't for the faint of heart. You will end up covered in glitter and it will end up in crazy places. The valentines are reproductions of vintage Valentines from this book: Vintage Valentines (Press Out Book). The window is from my stash of old stuff found at flea markets. I was looking around for things to fill up space and the John 3:16 print (vintage) was just on my bookshelf. I thought it was perfect. If you click on the photo, you can zoom in.
The garland I made last year. It is made with playing cards and various ribbon.Pin It

Tuesday, December 31, 2013

2013 A Year in Review

Well, I've given in and decided to do a recap of the year. To say that a lot happened would be an understatement.

In January and February we started shopping for a minivan. It was a long slow process and we had to take a break due to my health issues. We eventually found a nice used van in June. I went to the Northwest Flower and Garden Show which is always a highlight for me. I also had surgery to remove my thyroid.

In March, C played baseball for the first time. He liked it enough to want to play again in 2014.

In April the boys had Spring Break and we took a short trip to Wenatchee to enjoy warmer sunnier weather. Due to a water leak our kitchen was torn apart and we stayed in temporary housing for a few days. Also in April I went through the unpleasant experience of going off my thyroid meds in order to prepare for radioactive iodine treatment. Being off the thyroid medication was the hardest part of 2013. I also went on the low iodine diet for a while.

May and June: I had radioactive iodine and was isolated for a few days. We celebrated C's birthday with an elaborate science party planned and executed by my husband.

In July my father in law visited us and helped to build two tree houses in our backyard. We went on vacation to the Okanagan region of BC.

The annual father son hike and camping trip took place in August. They tackled Mt. Pilchuk this year.

In September I traveled to my hometown of Calgary (alone) to celebrate my parents 50th anniversary.
I visited the farm (well the land that is left) where I lived from birth until age 11.

In October I went to Ruffles and Rust and I drove A to a lot of soccer practices. I took photos at all the games. I put together a slide show of photos of the players and got some great compliments from the parents.

In November all four of us traveled to Victoria to celebrate my parents 50th anniversary with a second party! I was able to show my slide show (which I spent hours putting together) to the attendees. I got my boys to wear ties for the occasion.
December was pretty uneventful other than a cold weather snap and the mystery virus which is currently afflicting me.

I'm hoping that 2014 is a LOT quieter!

Pin It

Wednesday, December 04, 2013

Advent Activities

Advent. What is it? Advent is a season of preparation that some Christians observe to prepare their hearts and minds for the coming of Jesus. Advent comes from the Latin word which means coming.  I like this quote:

For four weeks, it’s as if we’re re-enacting, remembering the thousands of years God’s people were anticipating and longing for the coming of God’s salvation, for Jesus. - Noel Piper (wife of John Piper)

I made my own advent wreath last year. It was pretty easy. I used a styrofoam form for the base. I added candle holders (from Michaels in the wreath making section). I took apart a thrift store wreath and hot glued fake evergreen branches around the base. The funny thing is that I bought advent candles for it and there were 4 in the package. For some reason I made 5 spaces for candles - that was before I bought the candles. :) There seems to be different numbering methods for the candles. I guess I'll get a white candle for that missing space. I think it is for lighting on December 25th. To be honest, we haven't actually lit the candles yet. I was the one who lit the candle for the 1st Sunday of Advent at church last Sunday.
Lego City Advent Calendar. Yes, I know this has nothing to do with the real meaning of Christmas but the boys love Lego and I got it on sale. Every day they create something - a dog with bones, a fireplace, a man holding hot chocolate, etc.
The Starbucks Advent calendar. I remember driving around trying to find a store that had one back in 2006 when these came out. They were hot sellers. They came with chocolates inside (which I enjoyed). When all the drawers are turned around, a wintry scene is revealed. Back in 2008 or so I printed out a Bible reading for each day along with a little symbol. I found the instructions on a homeschooling blog. Here's a sample.
Each day one of the boys pulls out the slip to read. We've been using it for years but they still enjoy it. They love traditions.
This year (as a family at supper) we are reading through the advent readings found in the Thriving Family magazine published by Focus on the Family. A subscription to the magazine is free upon request. The readings loosely tie in with Adventures in Odyssey which my oldest son LOVES to listen to.
For my personal advent devotions, I'm reading through this new little book by John Piper. It was $5 at Amazon.com. You can't beat that price!Pin It

Monday, November 04, 2013

Halloween 2013

This year, it seemed that getting ready for Halloween was a big challenge. Life has been so busy with other things and my hubby was out of town for a while so that threw me off as well. On Halloween we were also preparing to go out of the town very early the next morning.

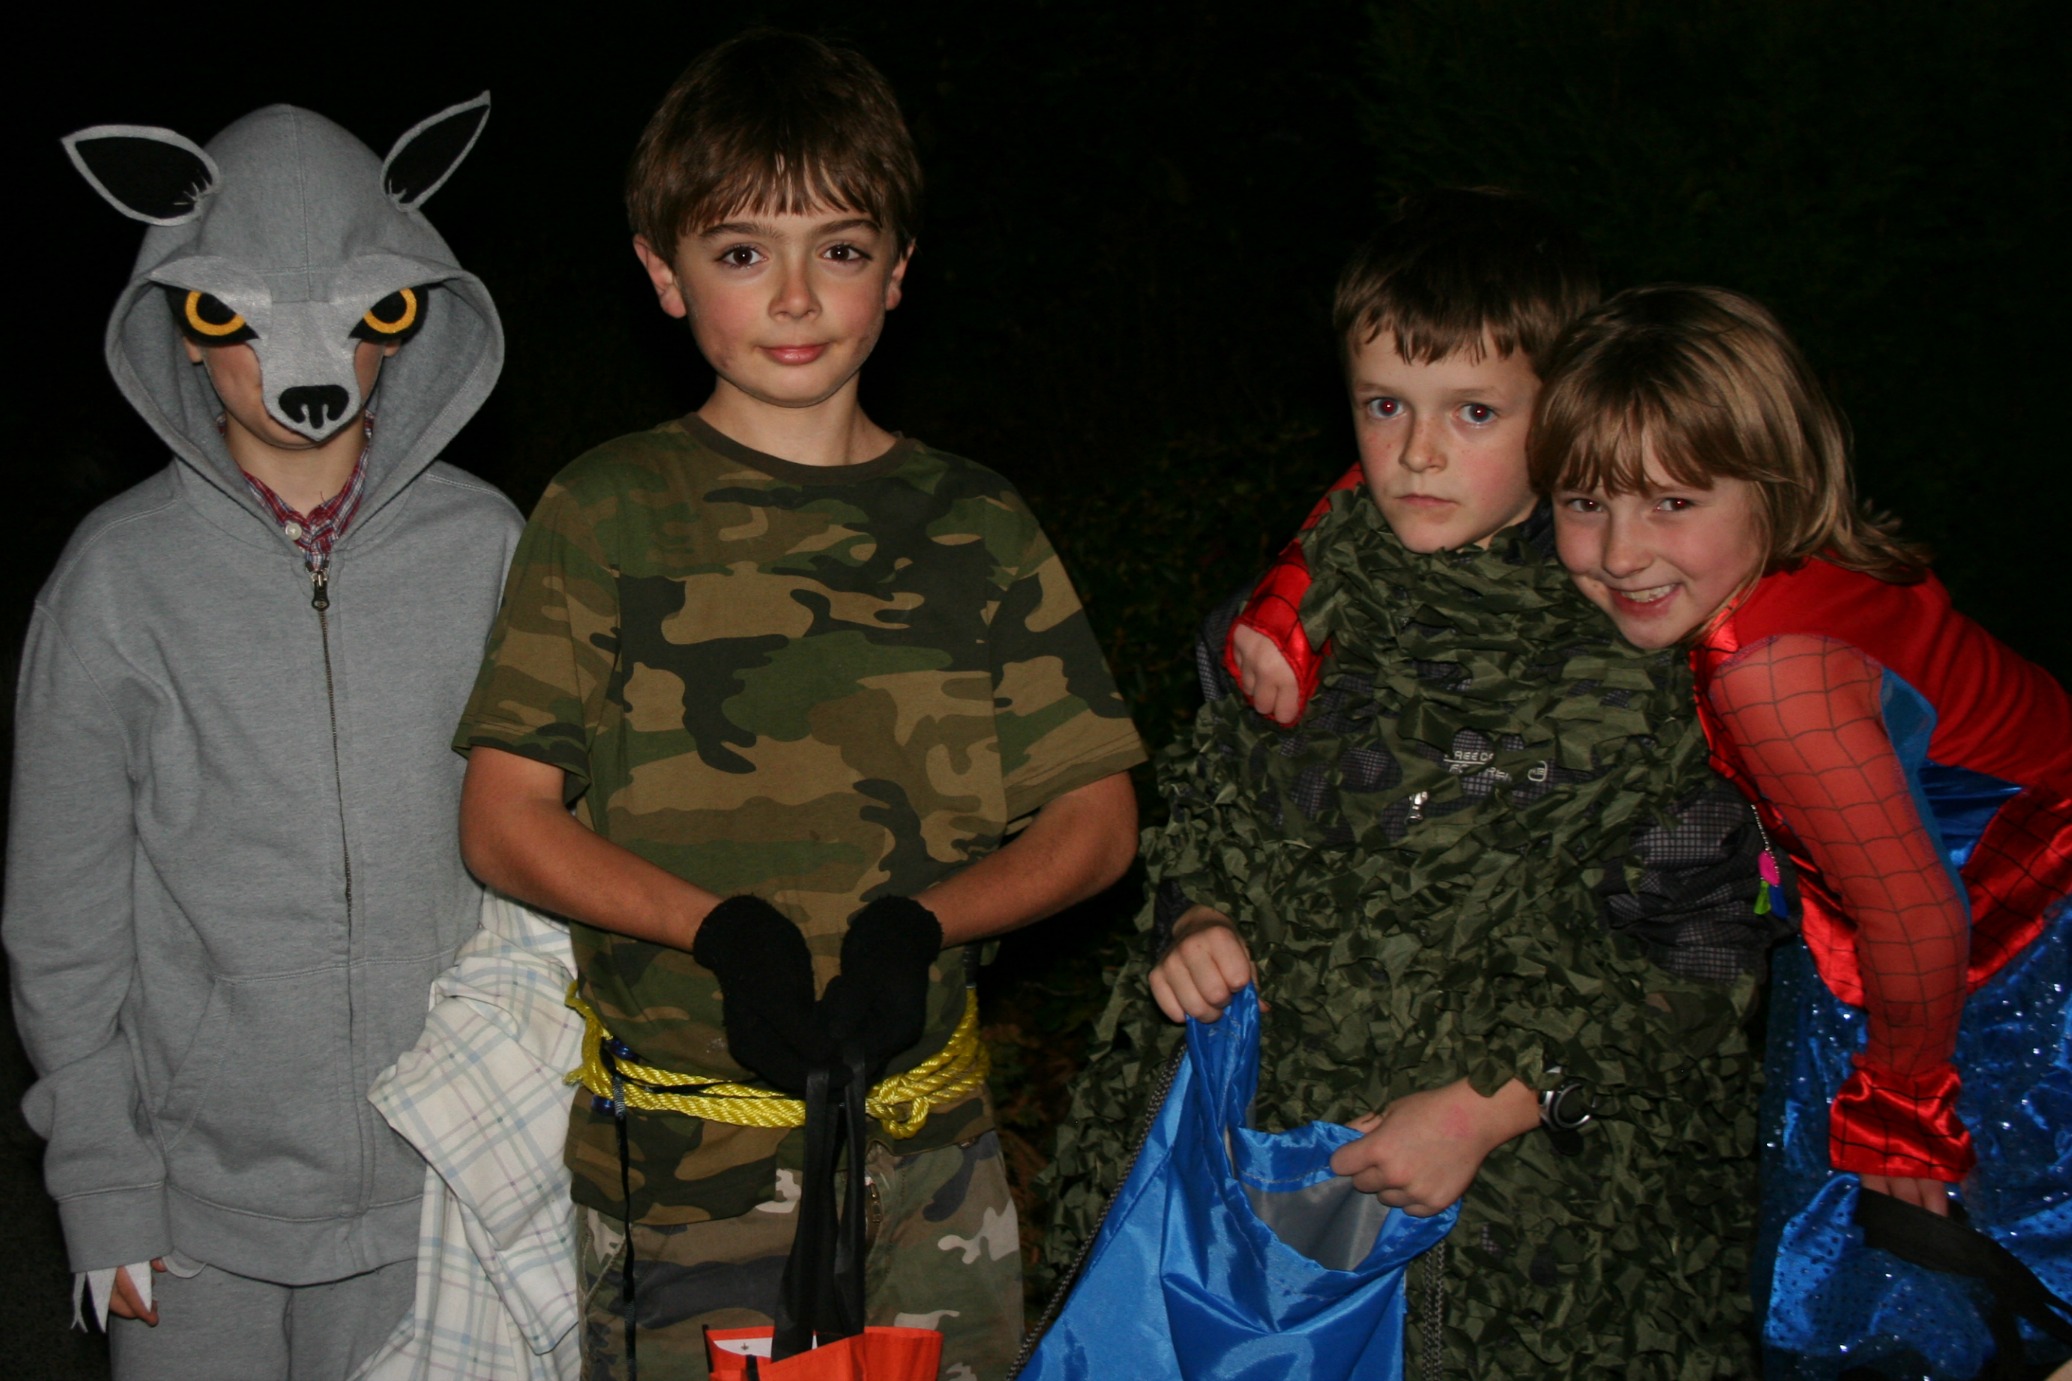
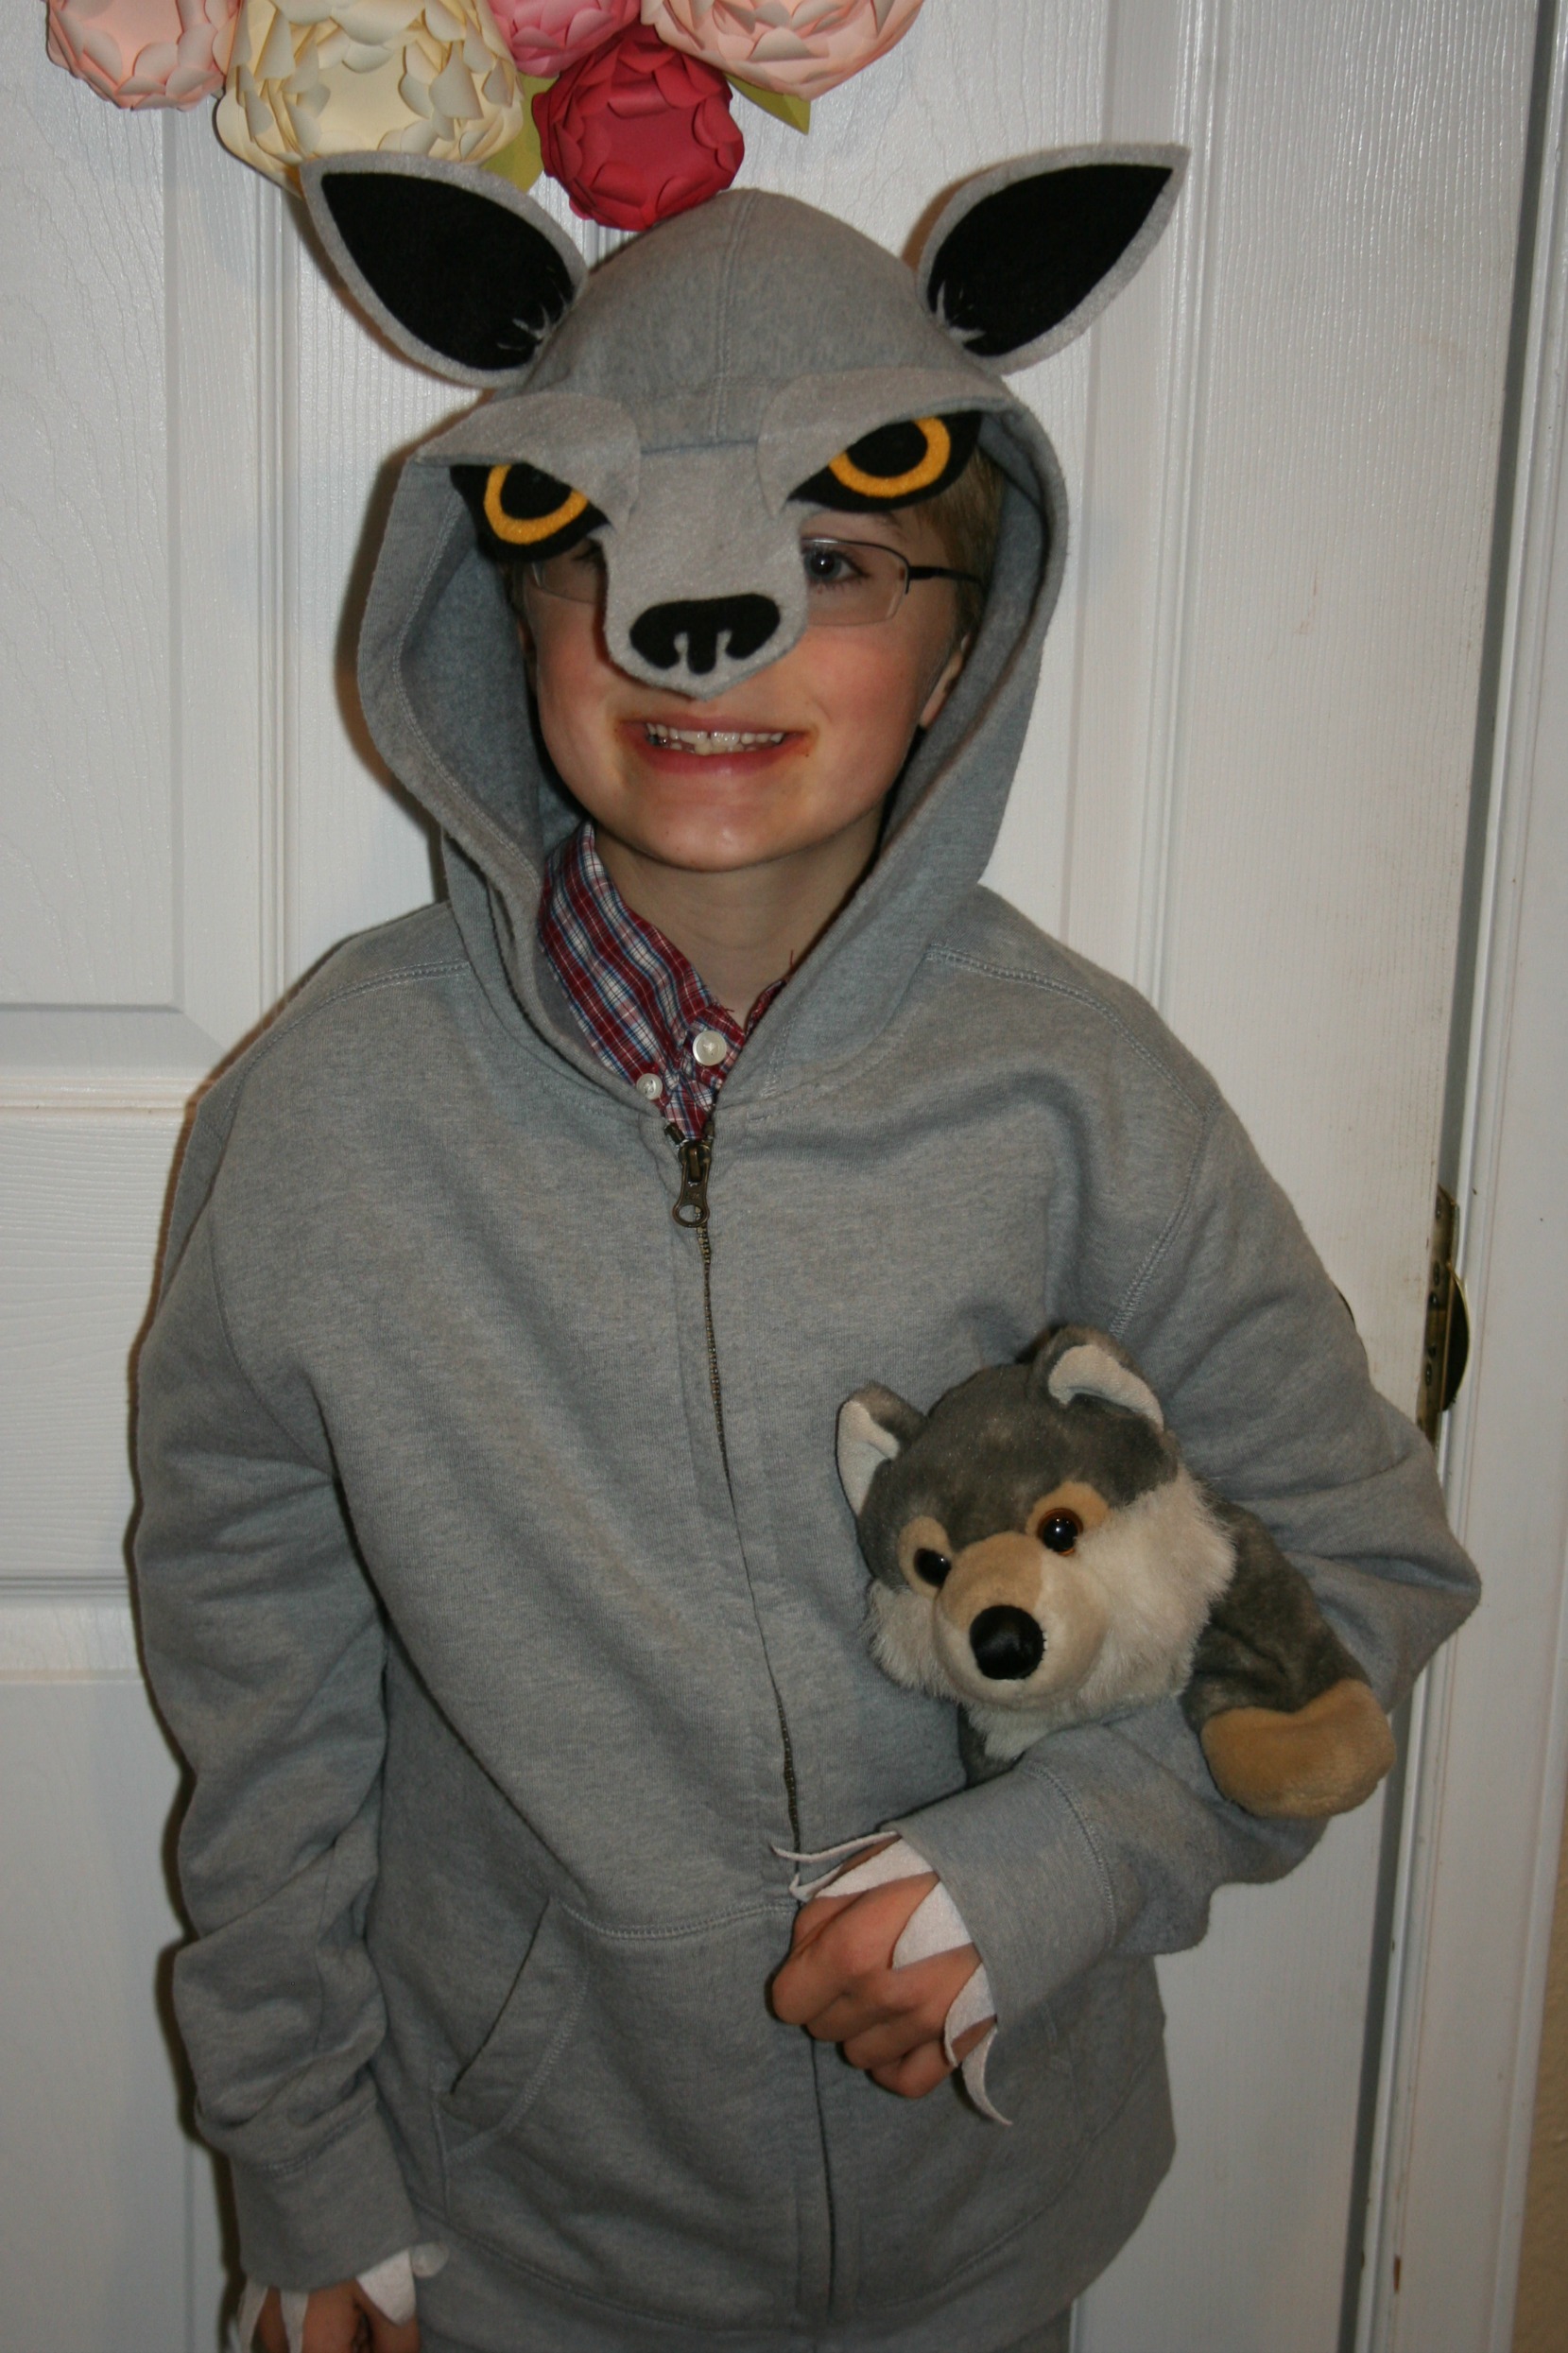
My youngest decided at the very last minute to be a wolf/werewolf and use the costume that his brother wore last year (which I made). The addition was a red plaid shirt underneath to be the werewolf part.

My oldest son didn't have a costume until about 4 pm on Halloween! He settled on being a survivor in the woods. He wore camo shirt, camo pants with a rope belt and a fake knife attached. He put some dirt on his face to look more authentic and wore black gloves.

We went to a very affluent neighbourhood for trick or treating. The street were packed! We were out for only about 90 minutes. The boys received lots of candy including some full size chocolate bars. The way that the houses were decorated was quite amazing. A lot of effort and thought was put into the displays and only a few were gruesome. We are thinking of returning at Christmas to see their light displays.

Here's a photo of the boys with their friends.

Here's a close up of my youngest son.


Pin It
Related Posts with Thumbnails